Showing posts with label NGINX. Show all posts

How to configure NGINX load balancer on CentOS 7 linux step by step guide


In this tutorial we learn how configure NGINX load balancer on Rhel/CentOs/Oracle (7/8)linux system. NGINX acts as a reverse proxy as well as load balancer also to distribute traffic among several backend servers to manage the serve load.

Lab environment

Load balancer server ipaddress  ================>192.168.137.2
Hostname of proxy server==============> lb.example.com

We have two web servers .
web server1 ip address ===============>192.168.137.3
hostname of webserver1 ==============>web1.example.com

web server2 ip address ===============>192.168.137.4
hostname of webserver2 ==============>web2.example.com

and put the host file entry if you don’t have any dns server like this.
[root@lb]# cat /etc/hosts
192.168.137.2     lb.example.com
192.168.137.3     web1.example.com
192.168.137.4     web2.example.com


Configuration of webservers


Before configuration of NGINX load balancer server first we have to configure a sample web server to demonstrate. For this we use apache web server. First we install httpd package and configure it and create a sample index.html file . to do this follow the below step.

To install apache web server we execute the below command.

#yum install httpd

After installing the httpd server start the service and on the startup mode using the below command.

#service httpd start;chkconfig httpd on

Now create a sample index.html file for webserver1 execute the below command

#echo “welcome to server1” > /var/www/html/index.html

Now create a sample index.html file for webserver2 execute the below command

#echo “welcome to server2” > /var/www/html/index.html

Configuration of NGINX load balancer on linux


To configure NGINX as a load balancer we need to install NGINX on your linux machine  .
See the reference to install the NGINX on linux system


After installing the NGINX we go to the configuration file of the NGINX server which is located at “/etc/nginx/conf.d/default.conf”  .

we remove the default configuration file using the below command.

#rm /etc/nginx/conf.d/default.conf 

and create a new file named "loadbalancer.conf".

add the below lines into the loadbalancer.conf file.
upstream backend {
   server 192.168.137.3;
   server 192.168.137.4;
}


server {
   listen 80;

   location / {
      proxy_pass http://backend;
   }
}

you can check the configuration syntax it is correct or not using the below command.

#nginx -t

Verify the configuration of NGINX load balancer


After completed the configuration verify the configuration that it is configured successfully or not. To verify it we curl the loadbalancer ipaddress from the NGINX loadbalancer and view the output that two webservers respond simultaneously .

How to configure NGINX load balancer on linux step by step guide

How to configure NGINX load balancer on linux step by step guide


[root@lb ~]# curl http://192.168.137.2
welcome to server1
[root@lb ~]# curl http://192.168.137.2
welcome to server2

If this article helpful to know about how to configure NGINX load balancer please share this.


How to configure NGINX as a reverse proxy on centos 7 linux step by step guide


 Configure NGINX as a reverse proxy |In this tutorial we learn how to configure NGINX as a reverse proxy to improve performance and security enhancement and other feature of NGINX server is that it acts as a load balancer also.

Lab environment


We have one reverse proxy server.
Reverse Proxy server ipaddress  ================>192.168.137.2
Hostname of proxy server==============> proxy.example.com
We have one web server .
web server ip address ===============>192.168.137.3
hostname of webserver ==============>web.example.com
and put the host file entry if you don’t have any dns server like this.

[root@proxy]# cat /etc/hosts
192.168.137.2     proxy.example.com
192.168.137.3     web.example.com


configuration of webserver


Before configuration of proxy server first we have to configure a sample web server to demonstrate. For this we use apache web server. First we install httpd package and configure it and create a sample index.html file . to do this follow the below step.
To install apache web server we execute the below command.
#yum install httpd


After installing the httpd server start the service and on the startup mode using the below command.
#service httpd start;chkconfig httpd on


Now create a sample index.html file execute the below command
#echo “welcome to techrideradmin.blogspot.com” > /var/www/html/index.html
Now web server configuration part is over . now we are going to configure the proxy server and verify it.and this server is running 8080 port

[root@web ~]# curl http://192.168.137.3:8080

“welcome to techrideradmin.blogspot.com”


configuration of reverse proxy


To configure NGINX  reverse proxy we need to install NGINX on your linux machine  .
See the reference to install the NGINX on linux system


after installing the NGINX we go to the configuration file of the NGINX server which is located at “/etc/nginx/conf.d/default.conf”  .
we remove the default configuration file using the below command.

#rm /etc/nginx/conf.d/default.conf 


and create a new file named "proxy.conf".
How to configure NGINX as a reverse proxy on linux step by step guide

                                             How to configure NGINX as a reverse proxy on linux step by step guide


And add the following lines
server {
listen 80;
listen [::]:80;
server_name proxy.example.com;

location / {
proxy_pass http://192.168.137.3:8080/;
}
}

After doing this we check using the below command from the reverse proxy server.


[root@proxy ~]# curl http://192.168.137.2
“welcome to techrideradmin.blogspot.com”


That’s all.Now NGINX acts as reverse proxy which hide the the origin or source of the backend server thus the server is secure from the outside world..


How to install NGINX web server on rhel 6 with practical step by step guide


How to install NGINX web server  on  rhel 6 with practical step by step guide

In this article we learn what is NGINX webserver and how to install NGINX web server and how to start NGINX service and know about location of NGINX related files.

What is NGINX webserver

NGINX is the high performance web server which serves 10,000 concurrent users at a time.it acts as a reverse proxy and placed in front of the webserver. It handles ssl, loadbalancing feature  and so on.

How to install NGINX web server on RHEL6

By default there  is no package related to NGINX web server. We have to install epel repo to install the NGINX web server.epel is the extra packages which is very useful to serve our need and commonly used software .to install epel repo we execute the following command  and as well as we need to install wget package  to install the epel repositories.

[root@localhost yum.repos.d]# yum install wget
Loaded plugins: ulninfo
Setting up Install Process
public_ol6_UEKR4                                         | 1.2 kB     00:00
public_ol6_UEKR4/primary                                 | 2.9 MB     00:19
public_ol6_UEKR4                                                        135/135
public_ol6_latest                                        | 1.4 kB     00:00
public_ol6_latest/primary                                | 7.1 MB     01:05
public_ol6_latest                                                   11288/11288
Resolving Dependencies
--> Running transaction check
---> Package wget.x86_64 0:1.12-10.el6 will be installed
--> Finished Dependency Resolution

Dependencies Resolved

================================================================================
 Package     Arch          Version               Repository                Size
================================================================================
Installing:
 wget        x86_64        1.12-10.el6           public_ol6_latest        483 k

Transaction Summary
================================================================================
Install       1 Package(s)

Total download size: 483 k
Installed size: 1.8 M
Is this ok [y/N]: y

Now we are going to install epel repo using the below command.

[root@localhost ~]# wget https://dl.fedoraproject.org/pub/epel/6/x86_64/epel-release-6-8.noarch.rpm
--2018-11-04 16:36:19--  https://dl.fedoraproject.org/pub/epel/6/x86_64/epel-release-6-8.noarch.rpm
Resolving dl.fedoraproject.org... 209.132.181.25, 209.132.181.23, 209.132.181.24
Connecting to dl.fedoraproject.org|209.132.181.25|:443... connected.
HTTP request sent, awaiting response... 200 OK
Length: 14540 (14K) [application/x-rpm]
Saving to: “epel-release-6-8.noarch.rpm”

100%[======================================>] 14,540      16.7K/s   in 0.9s

2018-11-04 16:36:22 (16.7 KB/s) - “epel-release-6-8.noarch.rpm” saved [14540/14540]

Now we need to install epel rpm package.

[root@localhost ~]# rpm -ivh epel-release-6-8.noarch.rpm
warning: epel-release-6-8.noarch.rpm: Header V3 RSA/SHA256 Signature, key ID 0608b895: NOKEY
Preparing...                ########################################### [100%]
   1:epel-release           ########################################### [100%]


To install the NGINX web server we execute the below command.

#yum install nginx
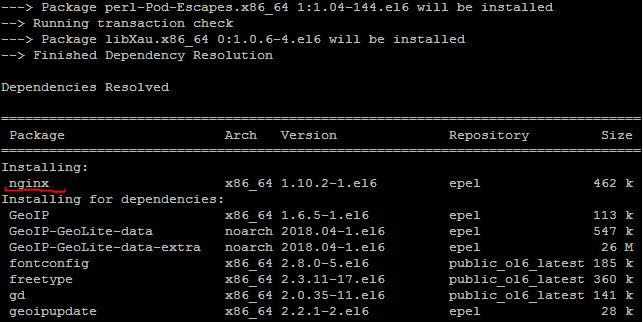
---> Package perl-Pod-Escapes.x86_64 1:1.04-144.el6 will be installed
--> Running transaction check
---> Package libXau.x86_64 0:1.0.6-4.el6 will be installed
--> Finished Dependency Resolution

Dependencies Resolved

================================================================================
 Package                    Arch   Version              Repository         Size
================================================================================
Installing:
 nginx                      x86_64 1.10.2-1.el6         epel              462 k
Installing for dependencies:
 GeoIP                      x86_64 1.6.5-1.el6          epel              113 k
 GeoIP-GeoLite-data         noarch 2018.04-1.el6        epel              547 k
 GeoIP-GeoLite-data-extra   noarch 2018.04-1.el6        epel               26 M
 fontconfig                 x86_64 2.8.0-5.el6          public_ol6_latest 185 k
 freetype                   x86_64 2.3.11-17.el6        public_ol6_latest 360 k
 gd                         x86_64 2.0.35-11.el6        public_ol6_latest 141 k
 geoipupdate                x86_64 2.2.1-2.el6          epel        
  
How to install NGINX web server  on  rhel 6 with practical step by step guide
How to install NGINX web server  on  rhel 6 with practical step by step guide

How to turn on NGINX service


After installing the NGINX server we need to turn on NGINX service to turn on the service we execute the below command.

#chkconfig nginx on

How to start/stop/restart the NGINX service


To start,stop and restart the NGINX service we need to execute the below command.

#service nginx start
#service nginx stop
#service nginx restart


Configuration files of the NGINX web server


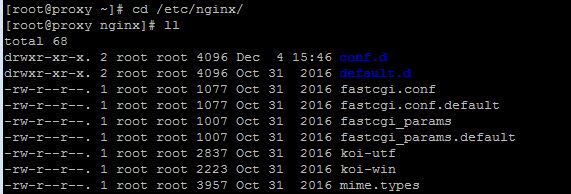
Default configuration file: /etc/nginx/nginx.conf
Default SSL and vhost config directory: /etc/nginx/conf.d/
Default document root directory: /usr/share/nginx/html
Default server access log file: /var/log/nginx/access.log
Default server access log file: /var/log/nginx/error.log
Default log file directory: /var/log/nginx/

Now the NGINX web server is installed in the next article we learn how to configure the NGINX web server and how it is working as a reverse proxy and act as a load balancer.