How to build and configure automatically custom Docker image using dockerfile on CentOS and RHEL 6/7 step by step guide


Build docker image from dockerfile | In this article we will learn how to build and configure automatically custom docker image using dockerfile on centos and rhel 7 system. Now we need to know the definition of dockerfile.

What is Dockerfile?

Dockerfile is a set of instruction which will be run to deploy an application.Docker image is created based on the instruction of docker file.

How to create a Dockerfile to build a docker image

First we need to create dockerfile which is filled by a set of instruction as below.

#touch dockerfile

Then edit the dockerfile and add the below lines.

FROM centos
MAINTAINER abc@email.com
RUN yum update
RUN yum install –y httpd
CMD "<your message>”

From the above line indicates that:

FROM : from which base image docker image will be created.
MAINTAINER: who is maintain the dockerfile.
RUN: run defined set of instruction which use to un the command and create the docker image.
CMD: message for the user.

Build docker image from dockerfile

To build  docker image from  dockerfile we need to execute the below command.

#docker build  -t centos-apache:v1 <dockefile location>

Sending build context to Docker daemon  3.072kB
Step 1/3 : FROM centos
latest: Pulling from library/centos
a02a4930cb5d: Pull complete
Digest: sha256:184e5f35598e333bfa7de10d8fb1cebb5ee4df5bc0f970bf2b1e7c7345136426
Status: Downloaded newer image for centos:latest
 ---> 1e1148e4cc2c
Step 2/3 : MAINTAINER abc@email.com
 ---> Running in 0ab288df423f
Removing intermediate container 0ab288df423f
 ---> a6f733efac95
Step 3/3 : RUN yum install -y  httpd
 ---> Running in 51fd64d94a5e
Loaded plugins: fastestmirror, ovl
Determining fastest mirrors
Installed:
  httpd.x86_64 0:2.4.6-88.el7.centos
Complete!
Removing intermediate container 51fd64d94a5e
 ---> 835398195c98
Successfully built 835398195c98
Successfully tagged centos-apache:v1
How to build and configure automatically custom Docker image using dockerfile on CentOS and RHEL 6/7  step by step guide,Build docker image from docker file,dockerfile
Build docker image from dockerfile
From the above command indicates that:

-t: mentin the tag to the image
Centos-apache: centos-apache is the image name .
V1: v1 is the tag of the image.
<dockerfile location>: location of the docker file.

After executing the above command we verify the images using the below command.

#docker images
REPOSITORY          TAG                 IMAGE ID            CREATED             SIZE
centos-apache       v1                  835398195c98        2 minutes ago       305MB

That’s all. If this article is helpful  to know about Dockerfile and Build docker image from docker file please share it!!!!


How to deploy and run application inside the isolated docker container on CentOS and RHEL 6/7 step by step guide


Deploy and Docker run image and save new image using Docker commit|In the previous article we learned  how to install Docker on centos and redhat linux system and learned use of docker container on centos and redhat linux system. In this article we will learn how to deploy and run an application inside the docker container.

Deploy and run an application inside Docker container

In the previous article we have installed centos docker image and here we will learn Docker run image (centos based docker container) where apache service will be installed . To do this we need to execute the below command.

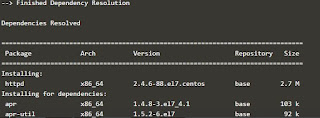
[root@localhost ~]# docker run centos bash -c "yum install -y httpd"

--> Finished Dependency Resolution

Dependencies Resolved

================================================================================
Package             Arch          Version                    Repository   Size
================================================================================
Installing:
httpd               x86_64        2.4.6-88.el7.centos        base        2.7 M
Installing for dependencies:
apr                 x86_64        1.4.8-3.el7_4.1            base        103 k
apr-util            x86_64        1.5.2-6.el7                base         92 k
centos-logos        noarch        70.0.6-3.el7.centos        base         21 M
httpd-tools         x86_64        2.4.6-88.el7.centos        base         90 k
mailcap             noarch        2.1.41-2.el7               base         31 k

Transaction Summary
================================================================================
Install  1 Package (+5 Dependent packages)

Total download size: 24 M
How to deploy and run application inside the isolated docker container on CentOS and RHEL 6/7 step by step guide,Docker run image,Docker Commit
How to deploy and run application inside the isolated docker container on CentOS and RHEL 6/7 step by step guide

After that we need to execute the below command to know the container id.

#docker ps  -a
CONTAINER ID        IMAGE               COMMAND                  CREATED             STATUS     PORTS               NAMES
8b451071cdd1        centos              "bash -c 'yum instal…"   3 minutes ago       Exited (0) 2 minutes ago                       agitated_hawking

Using this id we can stop , start and attach the container.


Docker Commit

We can save the new image using the container id . To save the new image we can execute the below command.To save the new image from container ID we use "Docker Commit" command.

#Docker commit <container ID> <New image neme>
# docker commit 8b451071cdd1 centos-apache
sha256:2f81cfc333d7cf8d61d3fbf21366ee1dd21f57c94bb5d7ca859ae4e99b9104c0

We can verify the new image name using the below command.

# docker images
REPOSITORY          TAG                 IMAGE ID            CREATED             SIZE
centos-apache       latest              2f81cfc333d7        33 seconds ago      305MB

Map the host container port on docker

To map the host container port we can run the below command.

 # docker run -it -p 81:80  centos-apache /bin/bash
[root@276c18a6318d /]#

After that we press ctrl+p and ctrl+q to continue the process and type the curl command on the shell to get the apache page as below.

Note: 81 is the host port and 80 is the container port.

#curl http://localhost

That’s all. If this article is helpful to know about Docker run image and save new image using Docker commit please share it!

How to download and remove Docker Image and use Docker container on CentOS and RHEL 6/7 and Ubuntu 16.04 step by step guide


Download Docker Image from the Docker Hub and Docker Remove Image | In this article we will learn how to download docker image and after downloading the image start and run docker container and play with docker container to run and deploy an application and how to remove docker image.

How to download Docker Image

We can download Docker Image from the Docker Hub on your linux system using the below command. Suppose we are going to download centos image first we need to search the available images into the central docker repo using the below command.

[root@localhost ~]# docker search centos
How to download Docker Image and use Docker container on CentOS and RHEL 6/7 step by step guide,Docker Remove Image,Docker Hub
How to download Docker Image and use Docker container on CentOS and RHEL 6/7 step by step guide

Once getting the available images we can download the image using the below command.

[root@localhost ~]# docker pull centos
latest: Pulling from centos
e4b082fc6cdb: Pull complete
f016d310caa9: Pull complete
ab9a80ab07d0: Pull complete
Digest: sha256:38777a4106f0072649128ea4236241345a3ed21c55abbbd53bad5342549f6126
Status: Downloaded newer image for centos:latest

To list the available docker images we can execute the below command.

 [root@localhost ~]# docker images
REPOSITORY          TAG                 IMAGE ID            CREATED             VIRTUAL SIZE
centos              latest              ab9a80ab07d0        6 weeks ago         201.8 MB


Docker Remove Image

If you want to remove docker image you can execute the below command.

[root@localhost ~]# docker rmi centos

If you want to remove docker image force fully then you need to use the below command.

[root@localhost ~]# docker rmi -f ab9a80ab07d0

How To Use Docker Container

 After downloaded the image we can start and run the docker container.  We can run the container using the below command. In this below command run the container using the downloaded image and get the downloaded centos release version.

[root@localhost ~]# docker run centos cat /etc/centos-release
CentOS Linux release 7.6.1810 (Core)

After running the docker container we need to know container id which is very useful to start and stop the container as well as you can use container name also to start and stop the container.

[root@localhost ~]# docker ps -a
CONTAINER ID        IMAGE               COMMAND                CREATED              STATUS                          PORTS               NAMES
a4d4d2937780        centos              "cat /etc/centos-rel   About a minute ago   Exited (0) About a minute ago                       sick_yalow

And you can start the container again using the below command.
[root@localhost ~]# docker start <container ID>

How To Run interactive session for docker container

To run interactive session for a docker container we can use the below command.

[root@localhost ~]# docker run –it centos bash

If you type exit into the shell the container will be stop and if you don’t want to stop container process you can press ctrl+p and ctrl+q at a time.

You can attach the container using the below command

[root@localhost ~]# docker attach <container id>

You can check the container process using the below command.

[root@localhost ~]# docker ps

That’s all.If this article is helpful to know about Download Docker Image from the Docker Hub and Docker Remove Image please share it!


Please Donate To Bitcoin Address: [[address]]
Donation of [[value]] BTC Received. Thank You.
[[error]]

How to install Docker on CentOS 7 /RHEL 7/Ubuntu 16.04 step by step guide


Install Docker in Ubuntu 16.04 / 18.04 LTS /CentOS 7/ RHEL 7 |In this tutorial we learn what is docker and how to install Docker on CentOS 7,RHEL 7 and Ubuntu 16.04 / 18.04.

What is Docker?

Docker is container service management. Docker is open source lightweight tool which allow us to create ,ship and run an application on isolated container. Developing task became easy for developer for docker because they only focus on coding.   

Docker Engine is important component for docker which is building the images and creating the container.

How to install Docker on CentOS 7 /RHEL 7

Docker package is available in the centos extra repository. you can install Docker package using the below command.

[root@localhost ~]# yum install docker -y


Install Docker in Ubuntu16.04/18.04

Docker package is available in ubuntu by default. To install Docker In Ubuntu 16.04 / 18.04 LTS we need to execute below command .There is no need to install extra repository like centos and redhat and oracle also.


# apt-get install docker -y

After installed the Docker package we need to start the docker service and enable the service at startup mode execute the below command.


 [root@localhost ~]#systemctl start docker
[root@localhost ~]#systemctl enable docker

After doing the above steps we can check the docker service status using the below command.

[root@localhost ~]#systemctl status docker
● docker.service - Docker Application Container Engine
   Loaded: loaded (/usr/lib/systemd/system/docker.service; disabled; vendor preset: disabled)
   Active: active (running) since Thu 2019-01-17 22:18:43 IST; 12s ago
     Docs: http://docs.docker.com
 Main PID: 2324 (dockerd-current)
   CGroup: /system.slice/docker.service
           ─2324 /usr/bin/dockerd-current --add-runtime docker-runc=/usr/lib...
           └─2328 /usr/bin/docker-containerd-current -l unix:///var/run/docke...

To know the Docker version and info

To know the docker version and docker info we need to execute the below command.
[root@localhost ~]#docker version
How to install Docker on CentOS 7 and RHEL 7  step by step guide,Install Docker in Ubuntu16.04
How to install Docker on CentOS 7 /RHEL 7/Ubuntu 16.04
And get the docker info run the below command.

[root@localhost ~]#docker info
Containers: 0
 Running: 0
 Paused: 0
 Stopped: 0
Images: 0
Server Version: 1.13.1
Storage Driver: overlay2
 Backing Filesystem: xfs
 Supports d_type: true
 Native Overlay Diff: true
Logging Driver: journald
Cgroup Driver: systemd
Plugins:
 Volume: local
 Network: bridge host macvlan null overlay
Swarm: inactive
Runtimes: docker-runc runc
Default Runtime: docker-runc
Init Binary: /usr/libexec/docker/docker-init-current

Verify Docker working or not on CentOS 7 and RHEL 7 and Ubuntu 16.04 /18.04

To verify Docker is working or not we can run test container image using the below command  and if you will get this below message then docker works correctly on your system.
[root@localhost ~]# docker run hello-world
Hello from Docker!
This message shows that your installation appears to be working correctly.

To get full list of docker command we can execute the command on the terminal.
[root@localhost ~]# docker
That’s all.If this article is helpful to know about Install Docker in Ubuntu16.04 / 18.04 ,CentOS 7/ RHEL7 please share it!!!

How to take backup of MySQL database using mysqldump utility and restore MySQL databsse from backup on linux system


Backup Mysql Database & Restore Mysql Database | In this tutorial we learn how to take backup of mysql database and import mysql dump on the linux system. Backup and restoration job is very important for a Database Administrator.

Backup MySQL database using mysqldump utility

To backup MySQL database we have to select the database name which database we want to take backup.After selecting the database we need to execute the below command to take backup of MySQL database.
This backup is the logical backup which is stored the data inside the linux filesystem.

Lets take an example to demonstrate how to take backup mysql database along with mysqldump example.

In my case we select “techrideradmin” database and there is one table named “student” inside the database. We want to take backup the “techrideradmin” database. After taking the backup we delete the table which is student and then restore the table using the backup file which is stored inside the linux file system.

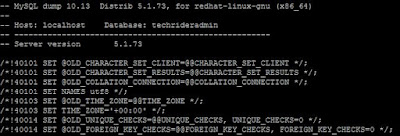
[root@localhost ~]#  mysqldump -u root -p techrideradmin > /backup/backup-$(date +%F).sql
Enter password:

We can list the backup file which we have taken using the below command.

[root@localhost ~]# cd /backup/
[root@localhost backup]# ls
backup-2019-01-15.sql
How to take backup of MySQL database using mysqldump utility and restore MySQL backup on linux system,backup mysql database,import mysql dump
How to take backup of MySQL database using mysqldump utility and restore MySQL backup on linux system 
After enter the password backup will be completed. In the above command –u define which user is taking backup or which user has permission taking the backup and –p define the password of the user.

Restore MySQL database from the backup file

To restore the database using import mysql dump we need to create the MySQL database. After creating the database we need to execute the below command to restore the database from  the backup file.
[root@localhost ~]# mysql -u root -p techrideradmin < /backup/backup-2019-01-15.sql
Enter password:

After executing the above command we can restore the techrideradmin database smoothly.

That’s all. If this tutorial is helpful to know about Backup Mysql Database and import mysql dump please share it!

How to configure MySQL Master-Slave replication setup on Centos/RHEL/Oracle server step by step guide


In this article we learn how to configure MySQL Master Slave replication setup on linux.For this we have two server one is master server and other is slave server. We have to install MySQL on both node.

Master server ip address==========192.168.137.4
Slave server ip address===========192.168.137.3

Configuration Master server for Master-Slave replication

To configure Master server for Master slave configuration first we need to open the my.cnf file and add the below lines into the files.

server-id = 1
log-bin = /var/lib/mysql/mysql-bin
binlog-do-db=techrideradmin

From the above lines you need to change the bolded database name as per your requirement.
To take effect the config file we need to restart the mysql service using the below command.

[root@masterdb ~]# service mysqld restart
Stopping mysqld:                                           [  OK  ]
Starting mysqld:                                           [  OK  ]

After that we need to configure slave user and grant the permission for replication using the below command through mysql promt.

mysql> GRANT REPLICATION SLAVE ON *.* TO 'slave_techuser'@'%' IDENTIFIED BY 'password';
Query OK, 0 rows affected (0.00 sec)

mysql> FLUSH PRIVILEGES;
Query OK, 0 rows affected (0.00 sec)

After lock the database to pevent the new changes using the below command.

mysql> FLUSH TABLES WITH READ LOCK;
Query OK, 0 rows affected (0.00 sec)

To know the file name and position we need to execute the below command which is required to configure slave part.

mysql> SHOW MASTER STATUS;
+------------------+----------+----------------+------------------+
| File             | Position | Binlog_Do_DB   | Binlog_Ignore_DB |
+------------------+----------+----------------+------------------+
| mysql-bin.000001 |      106 | techrideradmin |                  |
+------------------+----------+----------------+------------------+
1 row in set (0.00 sec)

After that take backup of master database using the below command.

[root@masterdb ~]# mysqldump -u root -p techrideradmin > /backup/techrideradmin.sql
Enter password:

After taking backup we need to unlock table using the below command.

mysql> UNLOCK TABLES;
Query OK, 0 rows affected (0.00 sec)
mysql> quit
Bye

Copy the backup dump to the slave server using the below command.

[root@masterdb ~]# scp /backup/techrideradmin.sql root@192.168.137.3:/slave

Configuration Master server for Master-Slave replication

Open the mysql configuration file which is located at “/etc/my.cnf” and add the below lines.
server-id=2
master-host=192.168.137.4
master-connect-retry=30
master-user=slave_techuser
master-password=password
replicate-do-db=techrideradmin
log-bin = /var/lib/mysql/mysql-bin

To take effect the config file we need to restart the mysql service using the below command.

[root@masterdb ~]# service mysqld restart
Stopping mysqld:                                           [  OK  ]
Starting mysqld:                                           [  OK  ]

Now login the MySQL server and create techrideradmin database and restore the database using previous backup file.

mysql> create database techrideradmin;
Query OK, 1 row affected (0.00 sec)

Stop the slave using the below command.

mysql> stop slave;
Query OK, 0 rows affected (0.01 sec)

Now restore the dumped file using the below command.

[root@slavedb ~]# mysql -u root -p techrideradmin < /slave/techrideradmin.sql
Enter password:

Then execute the below command to get details from the master server.

mysql> CHANGE MASTER TO MASTER_HOST='192.168.137.4', MASTER_USER='slave_techuser', MASTER_PASSWORD='password', MASTER_LOG_FILE='mysql-bin.000001', MASTER_LOG_POS=106;
Query OK, 0 rows affected (0.11 sec)

Then execute the below command to start slave.

mysql> start slave;
Query OK, 0 rows affected (0.00 sec)

Then check the status of slave using the below command.

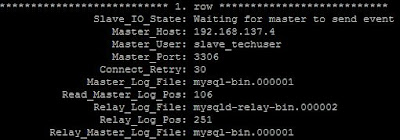
mysql> SHOW SLAVE STATUS\G
*************************** 1. row ***************************
               Slave_IO_State: Waiting for master to send event
                  Master_Host: 192.168.137.4
                  Master_User: slave_techuser
                  Master_Port: 3306
                Connect_Retry: 30
              Master_Log_File: mysql-bin.000001
          Read_Master_Log_Pos: 106
               Relay_Log_File: mysqld-relay-bin.000002
                Relay_Log_Pos: 251
        Relay_Master_Log_File: mysql-bin.000001
             Slave_IO_Running: Yes
            Slave_SQL_Running: Yes
              Replicate_Do_DB: techrideradmin
How to configure MySQL Master-Slave replication setup on Centos/RHEL/Oracle server step by step guide
How to configure MySQL Master-Slave replication setup on Centos/RHEL/Oracle server step by step guide 
That’s all. Master-Slave replication has been configured successfully if this aticle is helpful please share it!!!


Please Donate To Bitcoin Address: [[address]]
Donation of [[value]] BTC Received. Thank You.
[[error]]